Homemade Sushi
- christina
- entrees
 " alt="" />
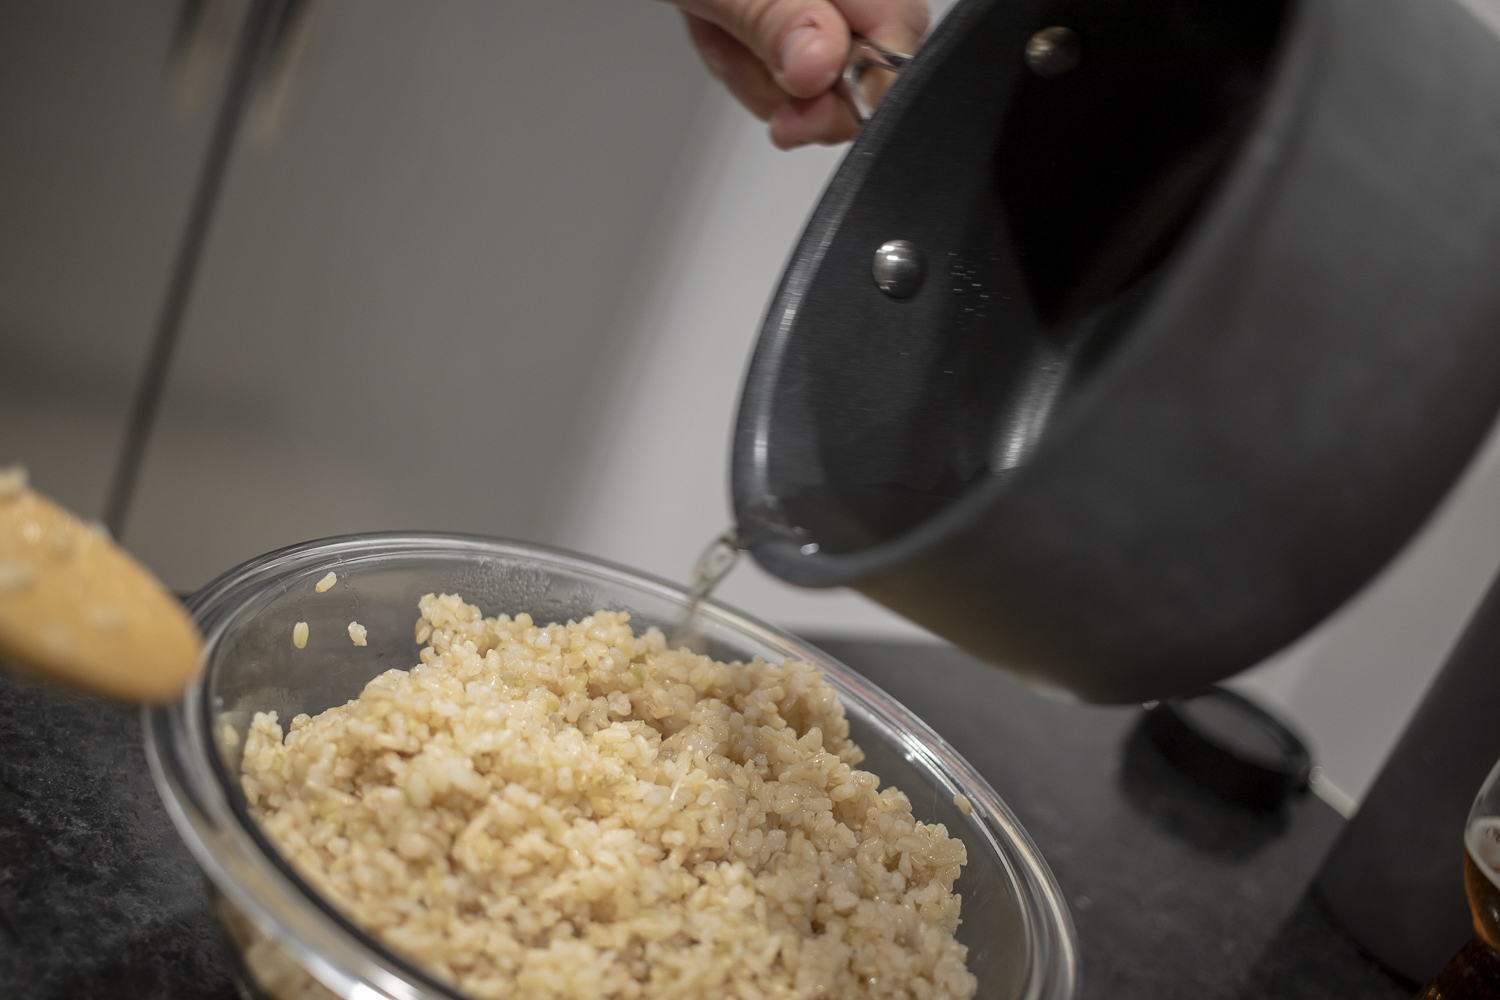 " alt="" />
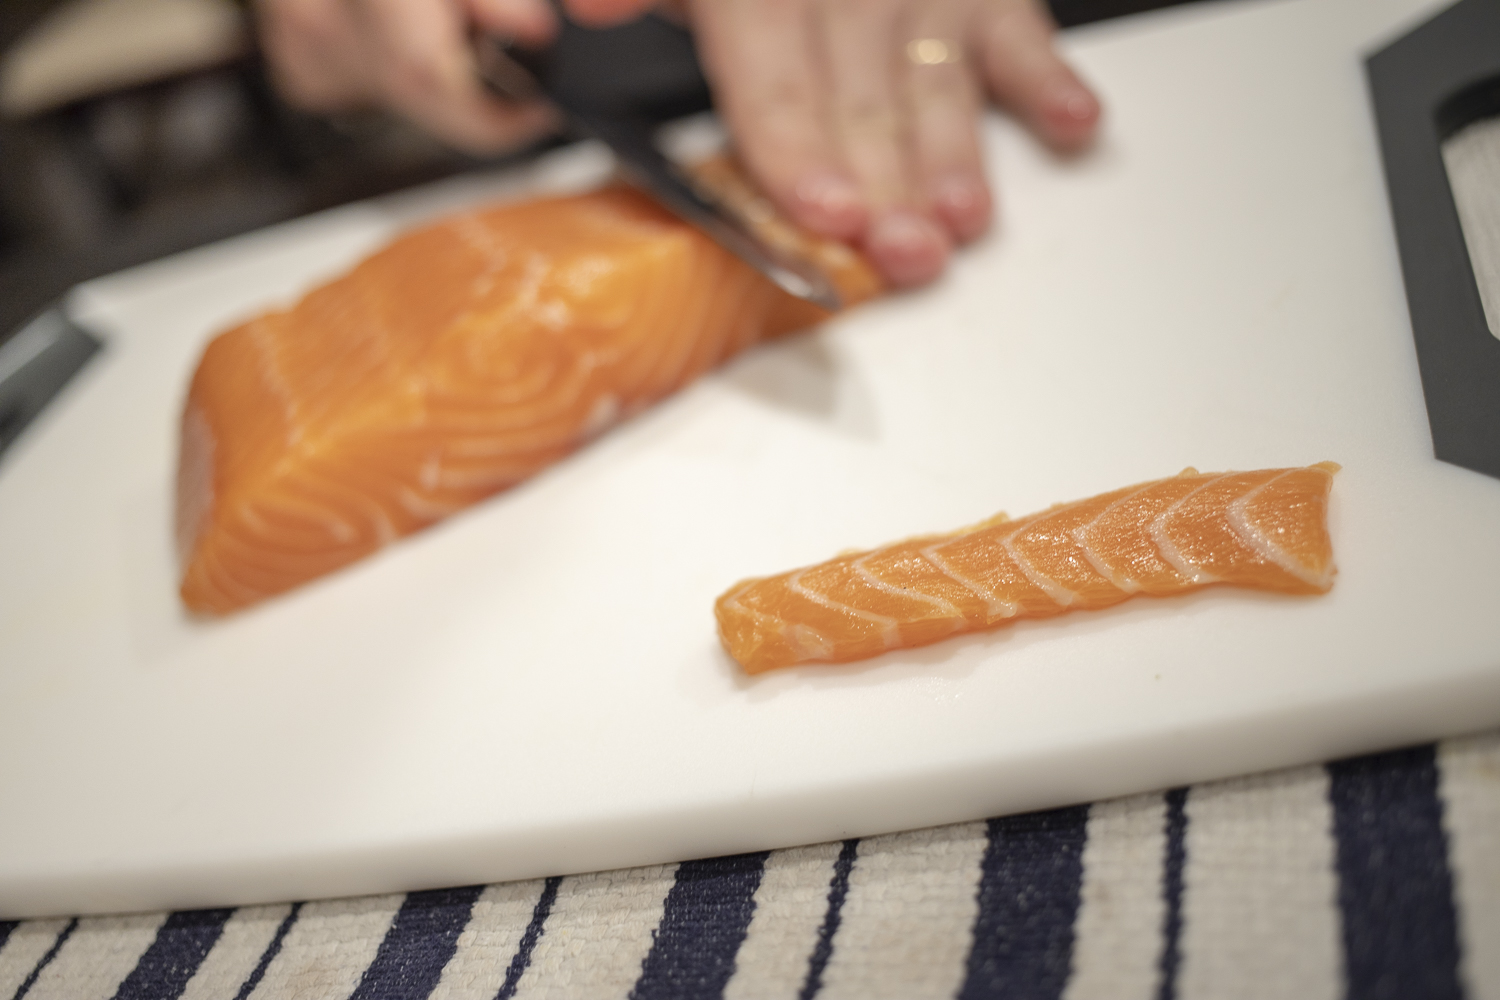 " alt="" />
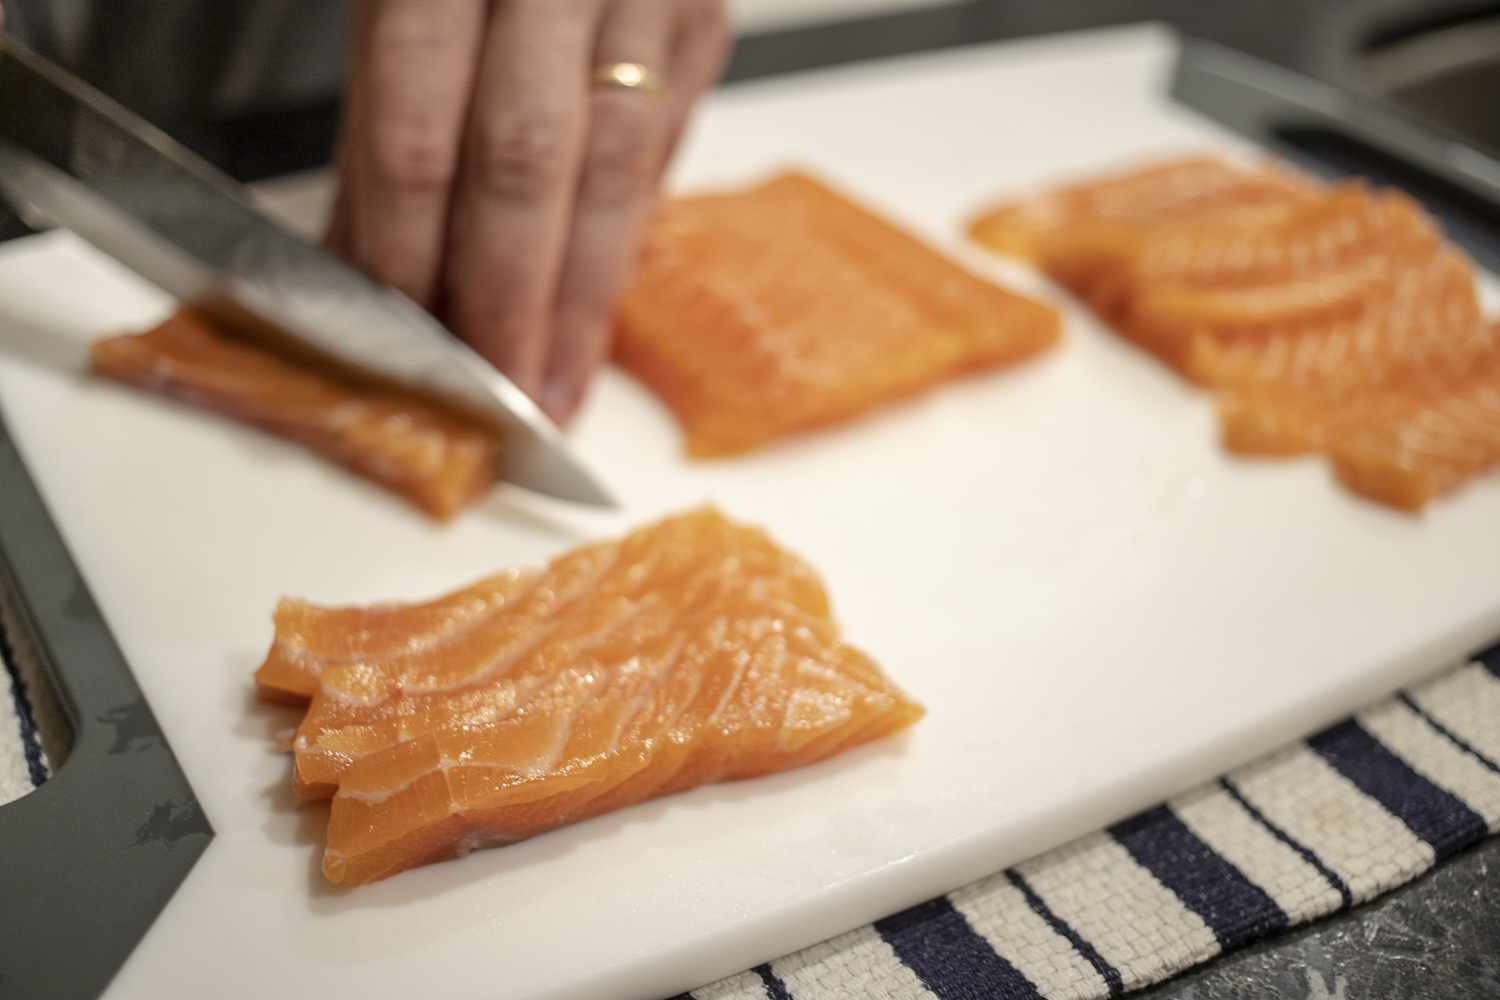 " alt="" />
 " alt="" />
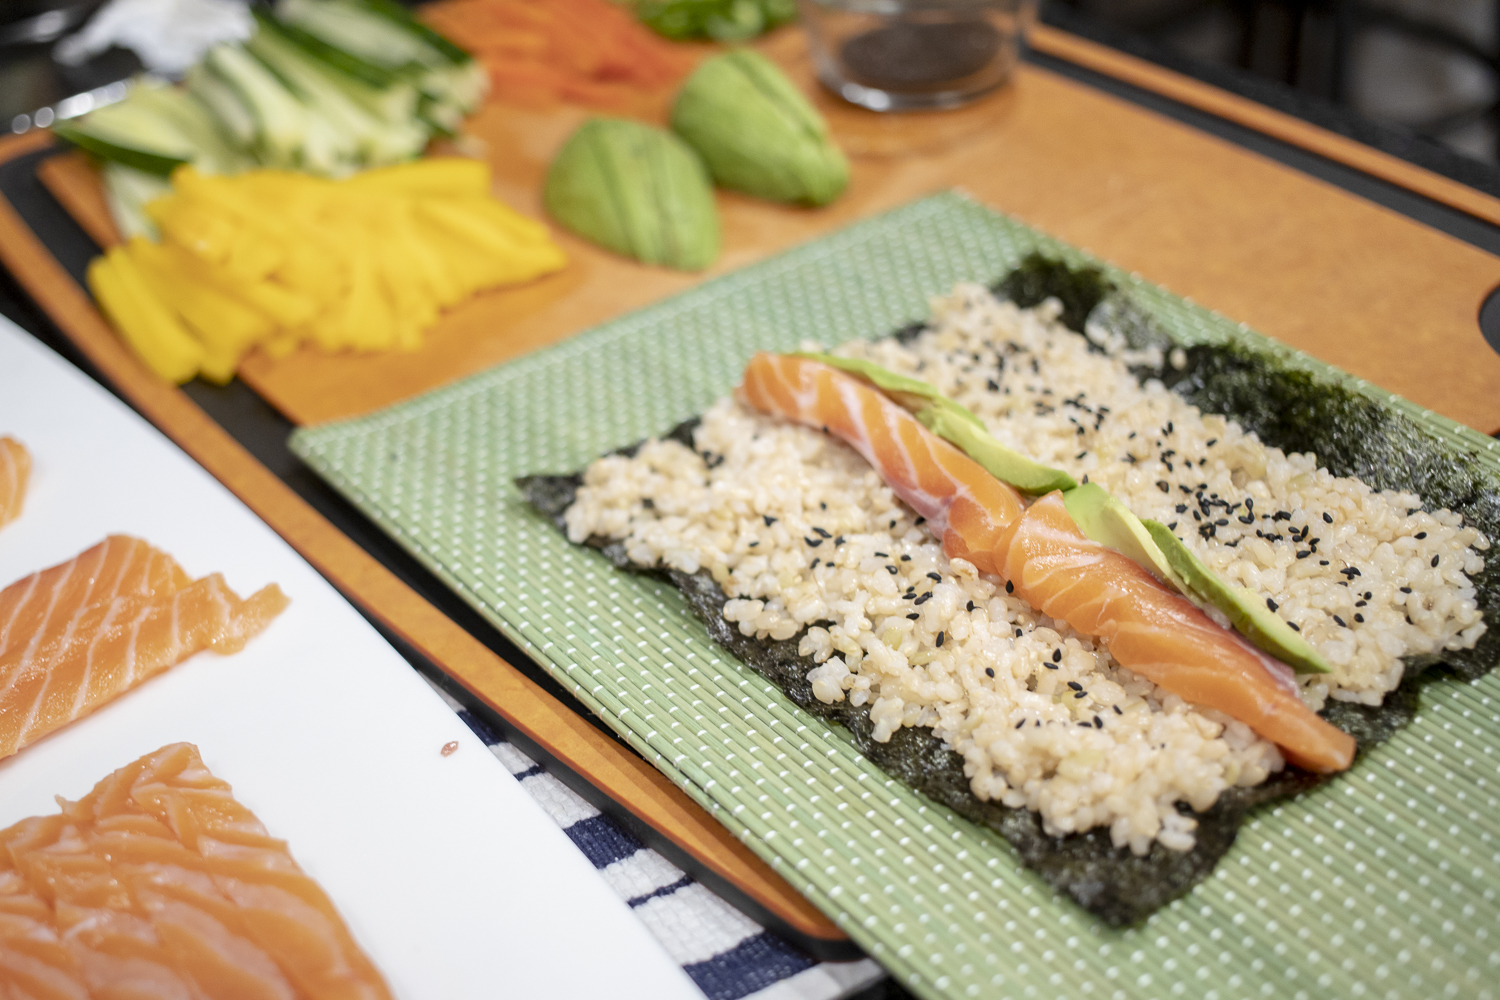 " alt="" />
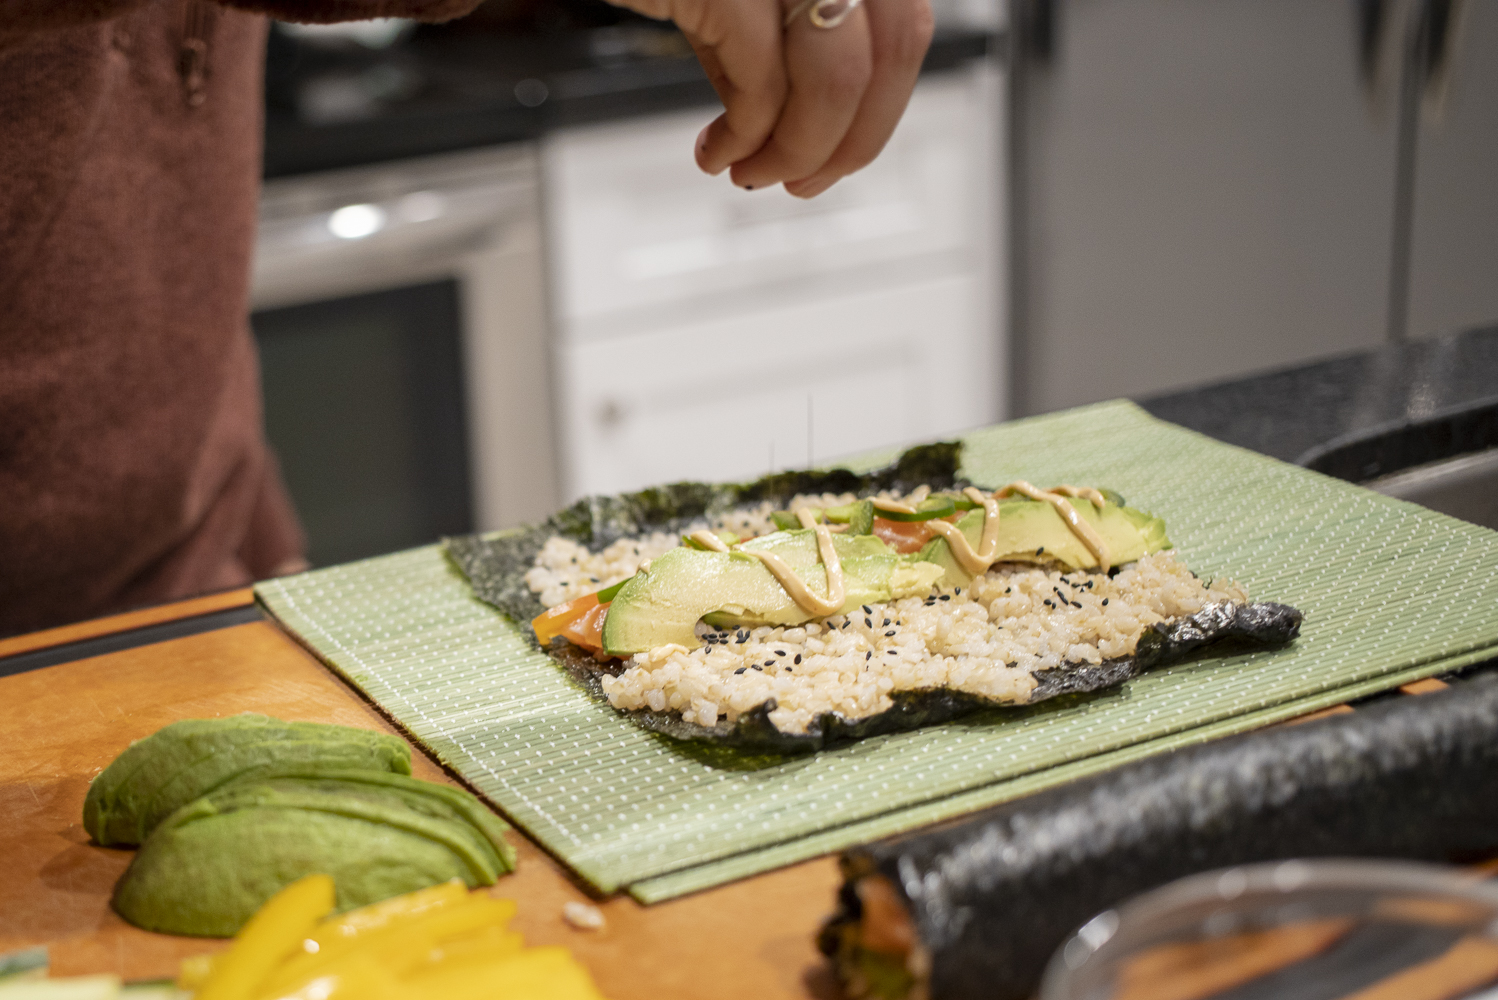 " alt="" />
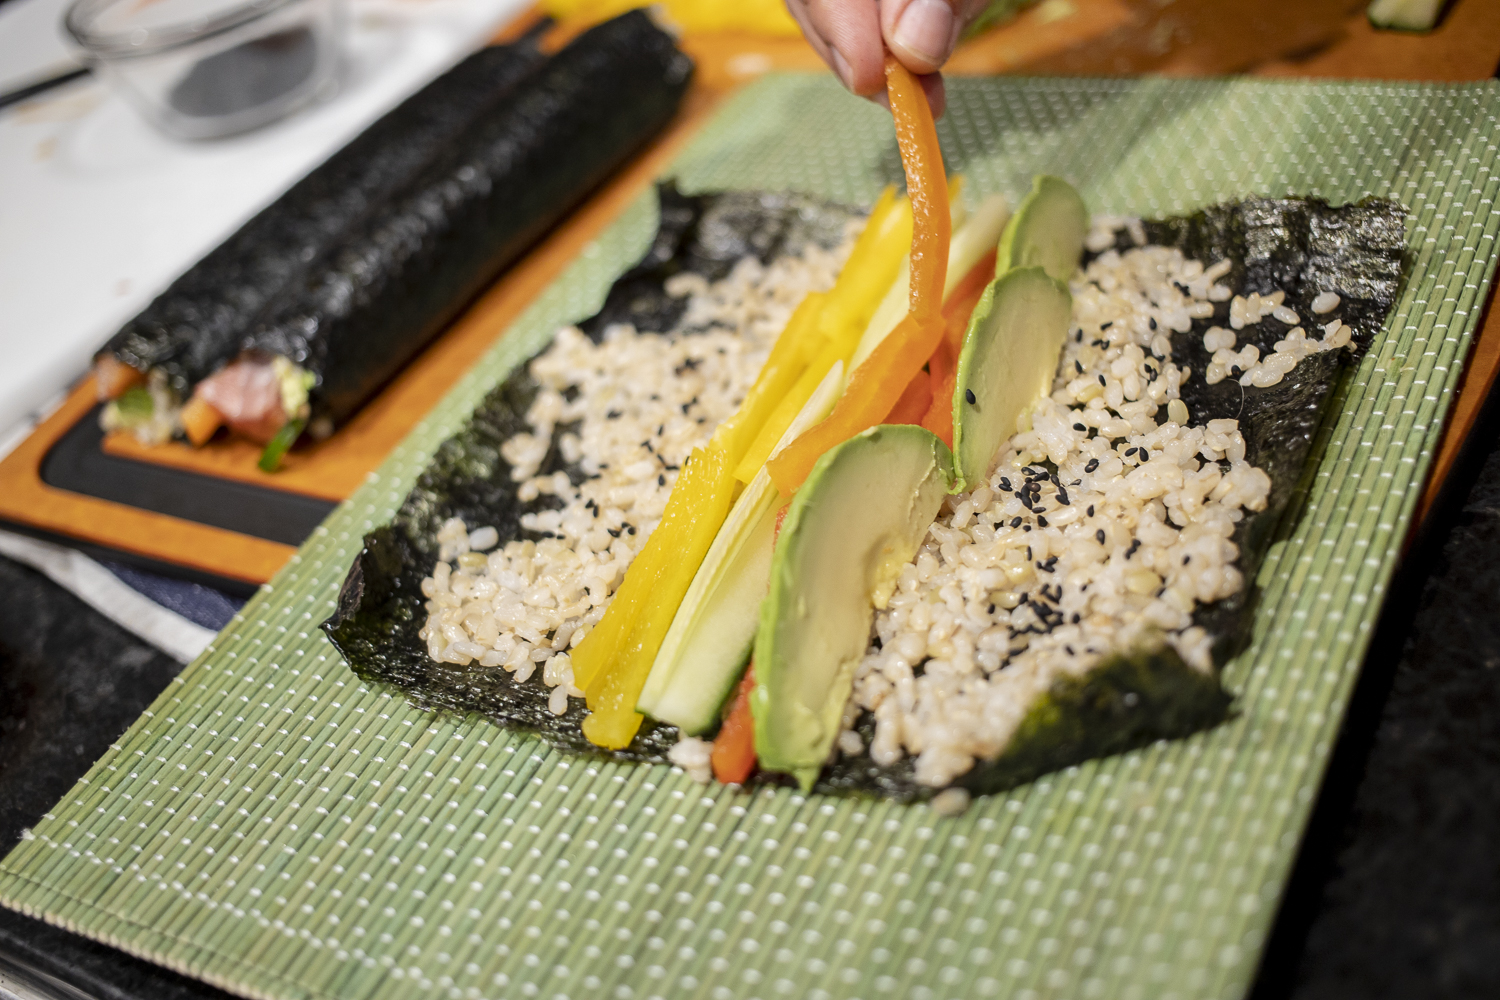 " alt="" />
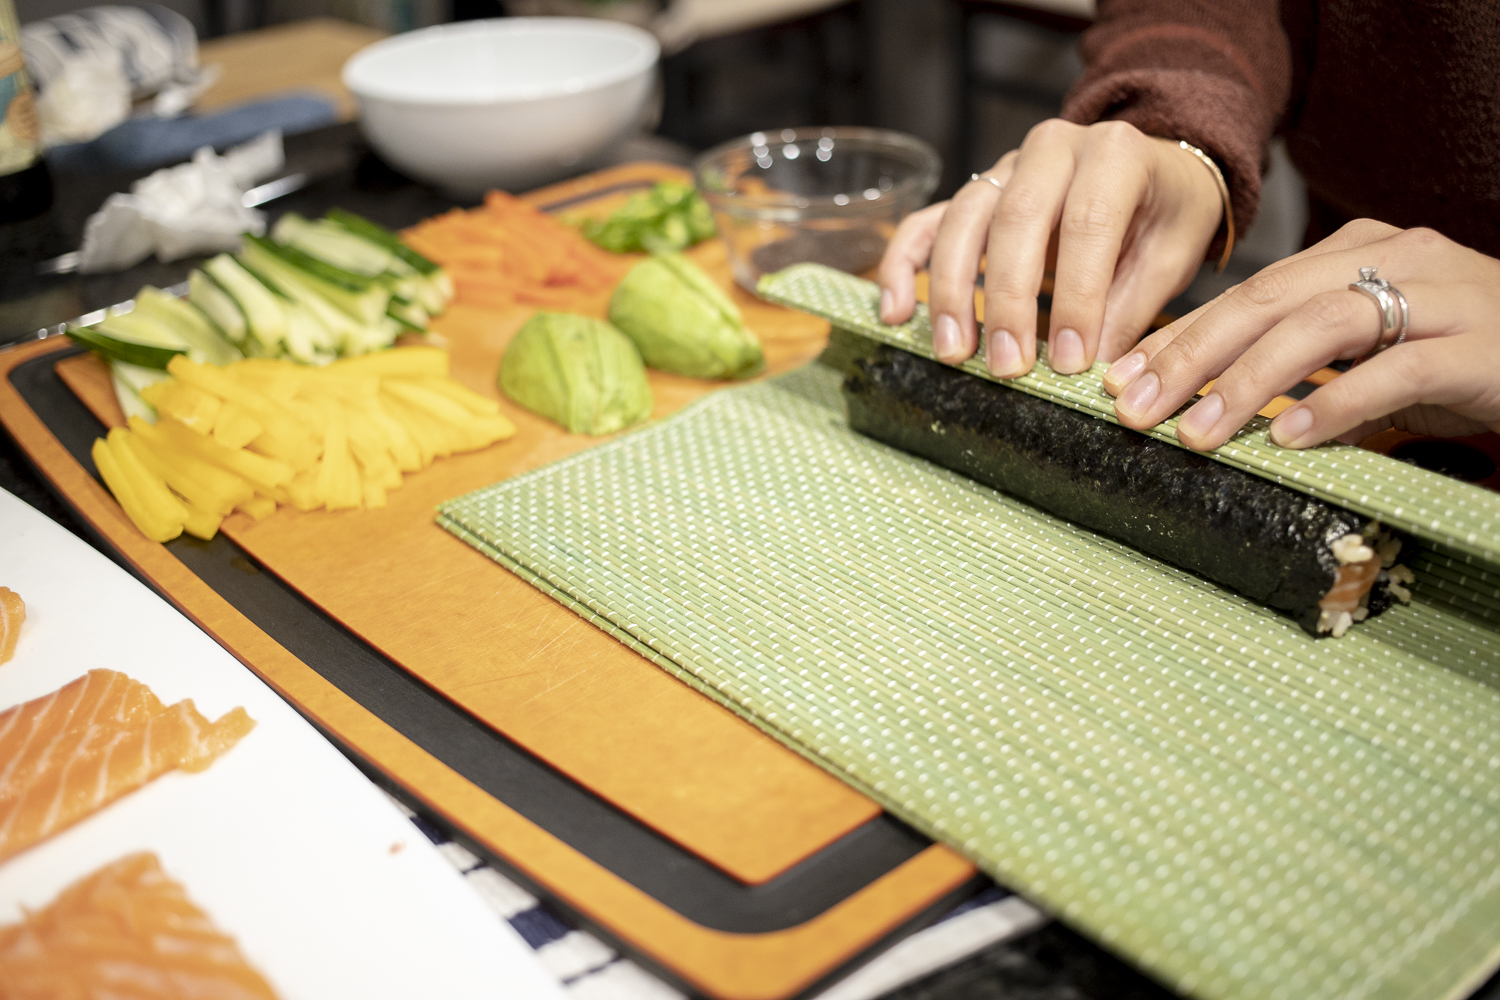 " alt="" />
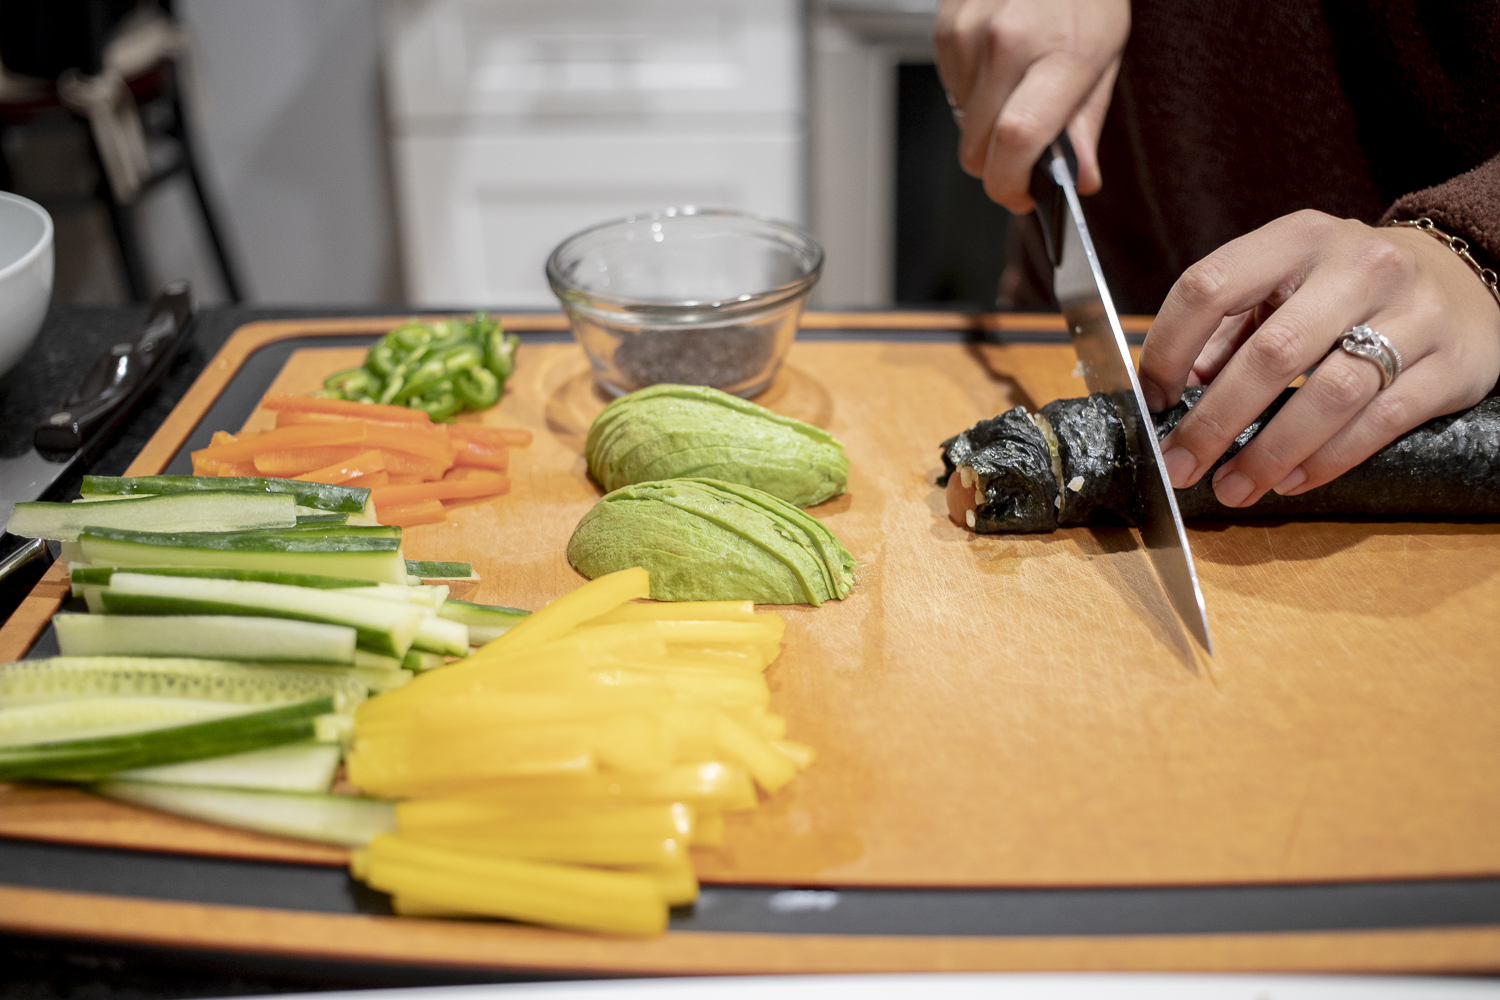 " alt="" />
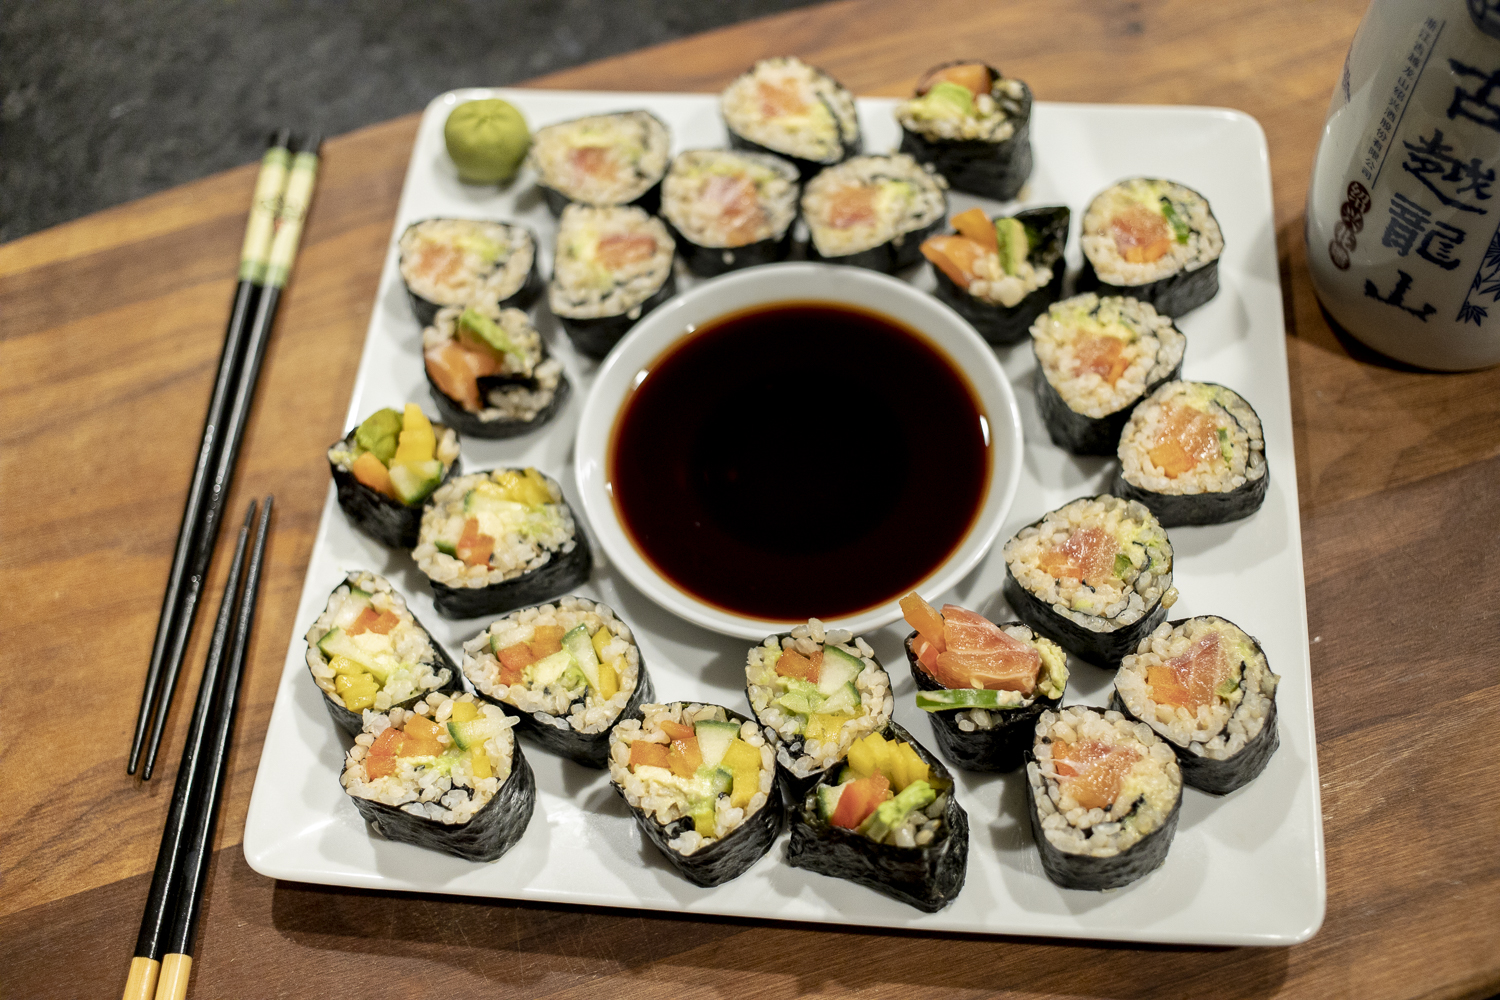 " alt="" />
- Serves: 8 Servings
- Prep Time: 60 mins
- Cooking: 25 mins
- Total Time: 1 hr 25 mins
Who loves sushi?? Raise your hand! We do too, but we hardly ever eat it because 1. It's kind of expensive when you go out to get really good sushi, and 2. Making it at home always felt really daunting. But, recently we were thinking of a fun new recipe to try and when sushi came up in our brainstorm session (yes, we brainstorm about what we want to make for dinner), we decided - why not?! And boy were we happy we went for it! Making sushi is definitely a dedicated effort but we had so much fun learning the process and trying something new. It's really rewarding. Sushi lets you get creative and stretch your culinary skills - you're in for a treat! We highly recommend giving homemade sushi a go.
My advice on making sushi at home:
Ingredients
Directions
The rice is the first thing you need to worry about. We will prep everything else while the rice cooks, but these steps take some time so let's get started with these first.
Making the Rice
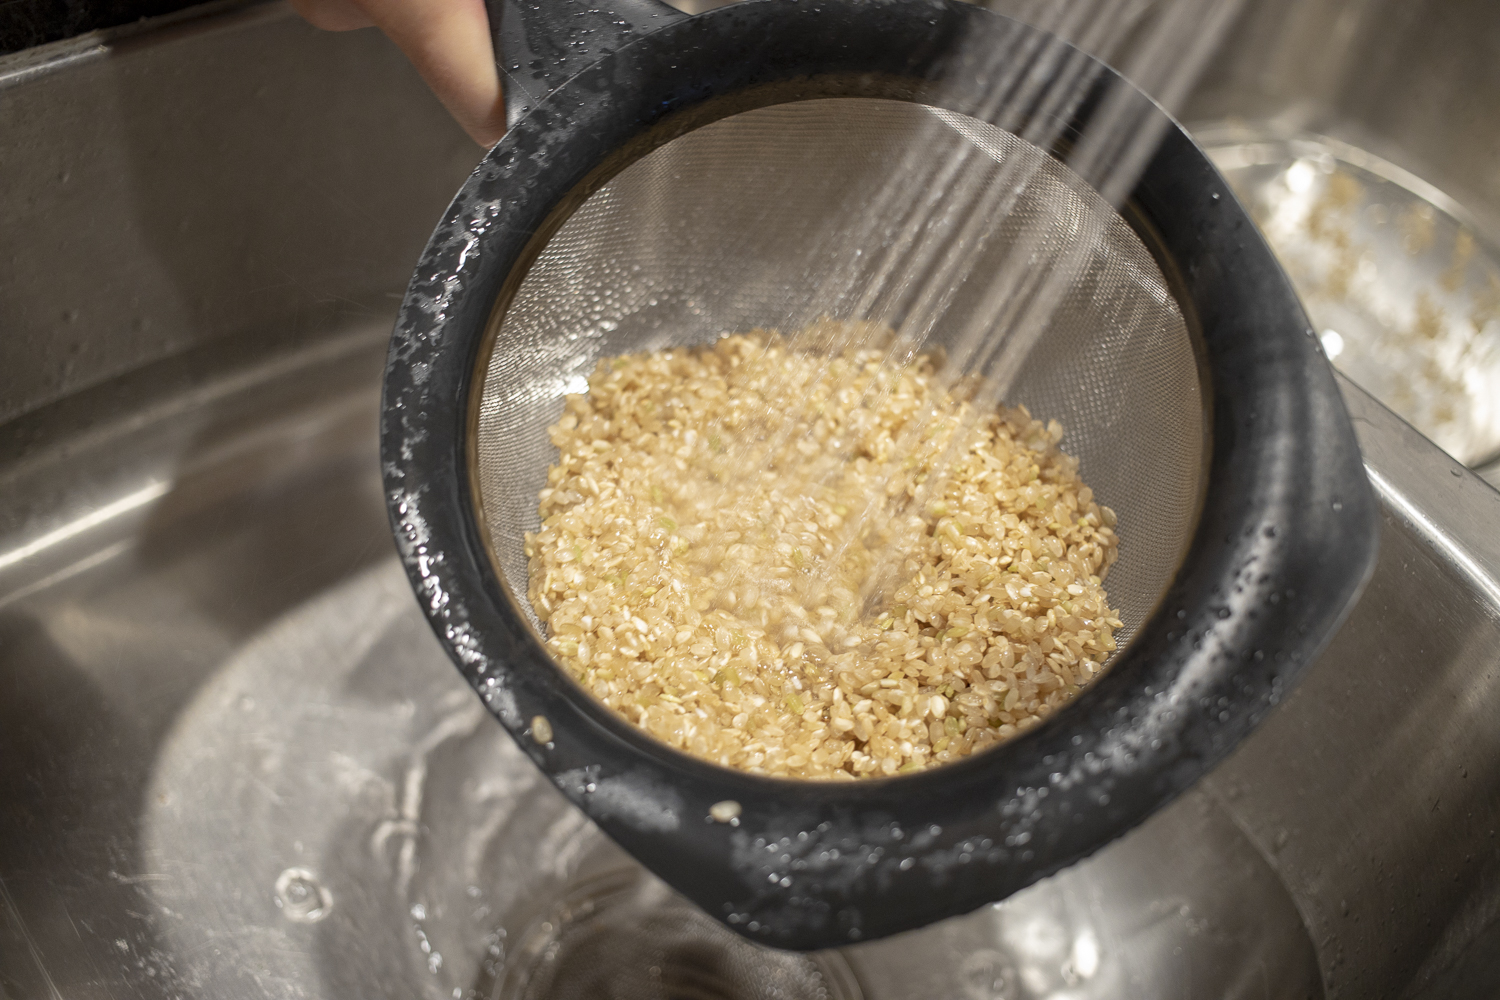
Rinse the rice in a colander to get all the starches off the rice. When rinsed thoroughly, leave in the colander to drain for 20 minutes.
When the rice has rested for at least 20 minutes, transfer it into a stock pot or rice cooker with 2 cups of water and let rest off the heat for another 20 minutes. After you've waited the total of 40 minutes now, place your stock pot onto the stove on high heat stirring occasionally until you reach a boil. Once boiling, cover with a lid and leave covered on simmer until all the water is absorbed. DO NOT STIR! Leave the lid on until the very end - no peaking! While the rice is cooking, place your rice wine vinegar, sugar, and salt into a small sauce pan and heat on medium until the sugar and salt are dissolved. Once dissolved, take off the heat and set aside to cool.
When the rice is done, gently remove the rice from the pot. If any rice doesn't easily fall out of the skillet, don't scrape the bottom of the pot to get the rice out. This rice is likely burnt and will ruin the rest of the rice. Place the good rice into a non-metallic bowl and let rest until at room temperature. DO NOT REFRIGERATE THE RICE, this will ruin your consistency and make it mushy.
Once the rice is at room temperature, pour your rice wine vinegar solution into the rice and gently fold it into the rice using a wooden spoon. Don't use a metal spoon or metal bowl as it can react with the vinegar solution. Set your rice aside until you're ready to make your sushi.
Prepping Your Ingredients
So we wanted to do a Salmon Avocado roll with spicy mayo, jalapeno and red bell peppers. It's our take on a southwestern style sushi roll, but you can really add anything you want. The idea is to keep everything in strips and then lay them next to each other like you will see below. But try anything you want! Things we liked were cucumber, salmon, avocado, peppers, and jalapeno.
On a clean cutting board with a clean, sharp knife begin by taking the salmon belly (the angled side of the filet) and thinly slicing off 1-inch thick slices of fish by slowly pulling your knife back towards you at an angle. This is kinda tricky but no matter what, it will always taste great no matter how they look.
When you are done cutting those and have reached the body of the filet, rotate the body of the fish 90 degrees and begin making 1-inch cuts straight down. When all the way through the fish, set the fish aside and on a new, clean cutting board begin making strips of all your other ingredients. Set aside all your prepped ingredients and get your station ready for rolling sushi!
To prep your sushi roll, use a bamboo rolling mat (or bamboo placemat) as your workstation. Lay out your nori on the mat and spread about 4-5 tablespoons of rice thinly across the nori. You should be able to see the nori through the rice layer. Leave the close end and far ends of your nori uncovered. In the middle of your rice-covered-nori lay out your ingredients* (a few rolls we made are listed below) parallel along the length of your nori (image below).
*Salmon-Avocado Roll with black sesame seeds.
*Southwestern Salmon Roll with avocado, bell pepper, jalapeno, chipotle mayo and black sesame.
*Vegan Roll with avocado, cucumber, bell peppers and black sesame.
Once you have your toppings laid out, wet the uncovered nori ends gently with water - a few drops or with wet fingertips. Lift the bamboo mat edge closest to you, roll it up and over the open face ingredients until the nori edge reaches the rice. Gently squeeze along the bamboo to secure your ingredients in place then continue until your roll is completely spiral wrapped all the way around. Once your roll is formed give it one final squeeze before removing the bamboo.
Remove your bamboo rolling mat and using a very sharp knife to slice your roll into 8 pieces. We recommend cleaning the knife with water between each roll. This process prevents the starches from the rice from sticking to the blade of your knife and dulling your next cut. Repeat and serve your sushi with soy sauce, wasabi and pickled ginger.
Enjoy!