Spatchcocked Roast Chicken
- nathan
- entrees
 " alt="" />
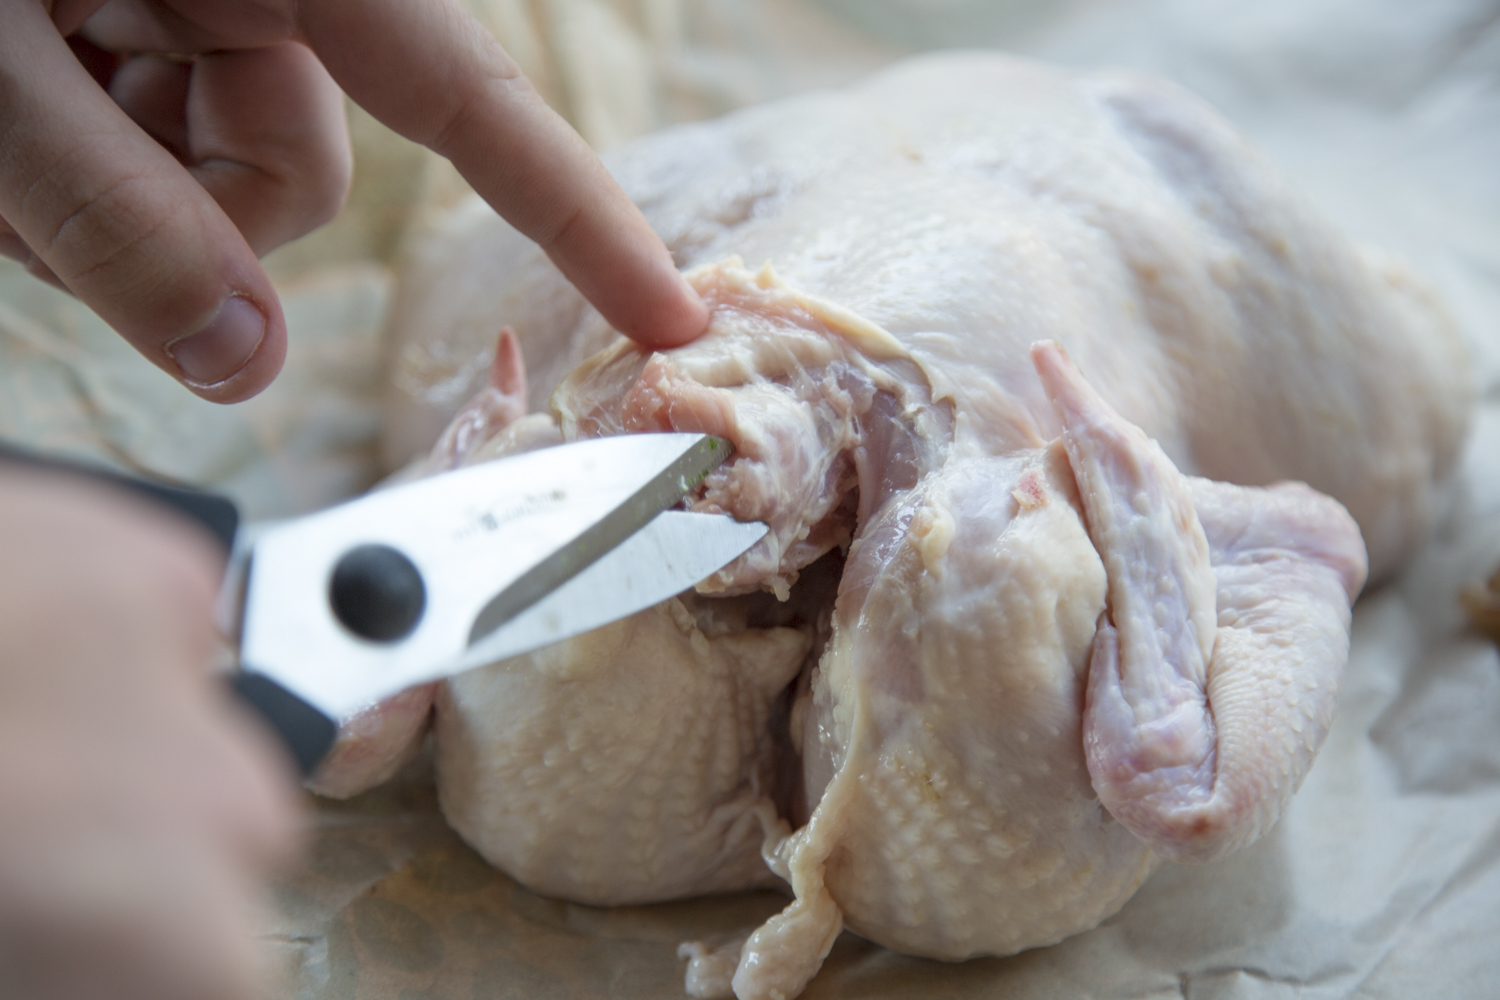 " alt="" />
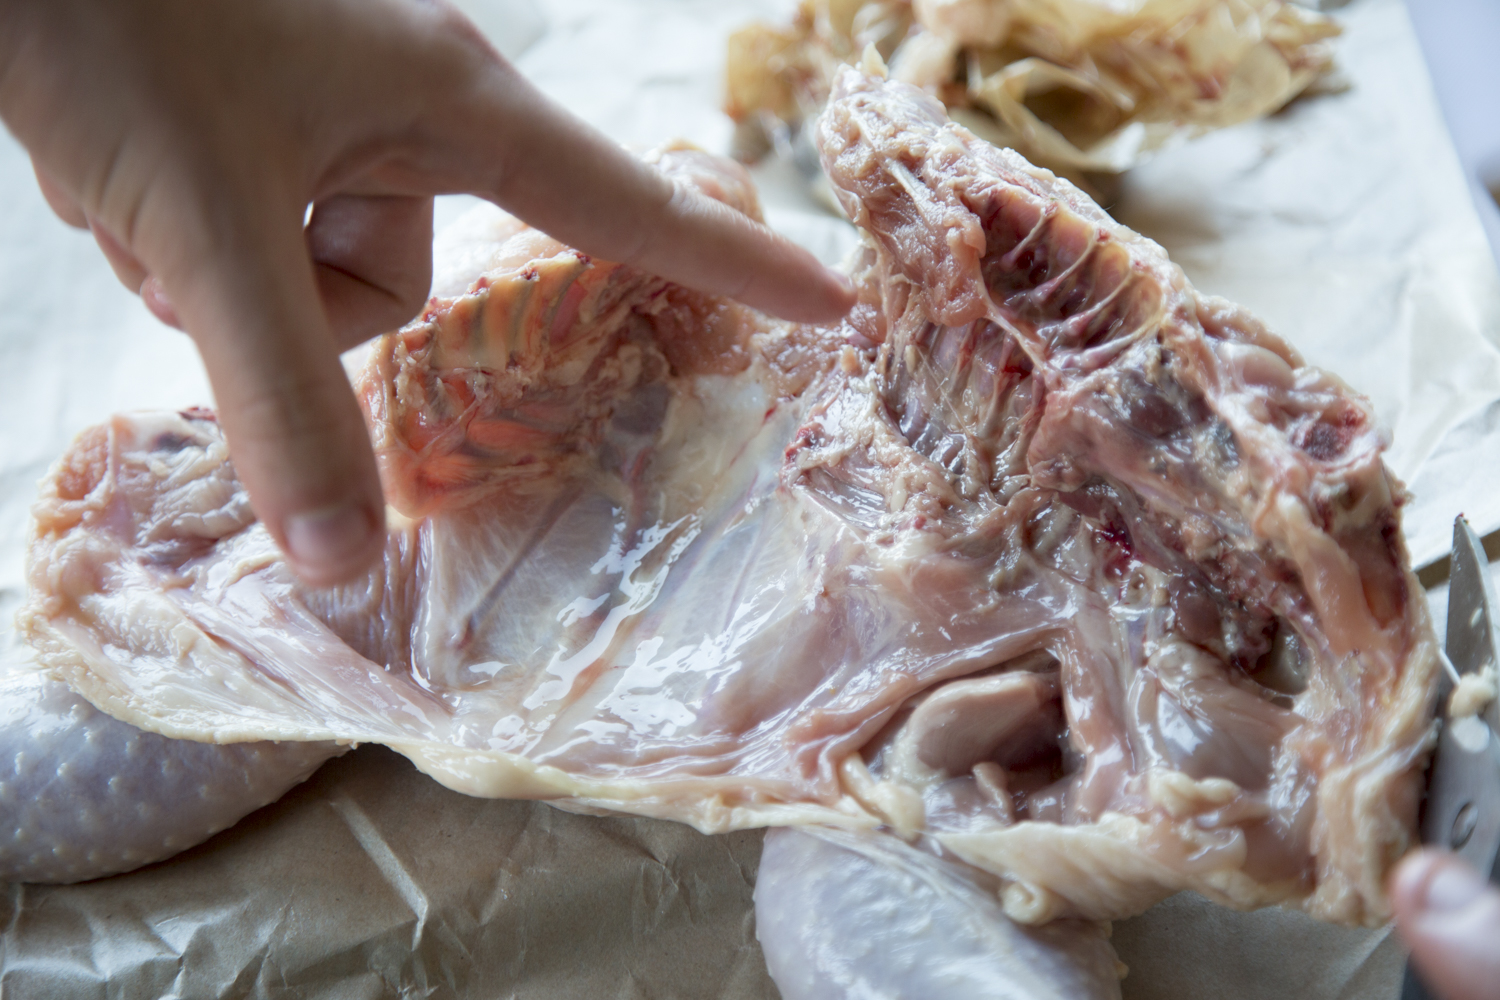 " alt="" />
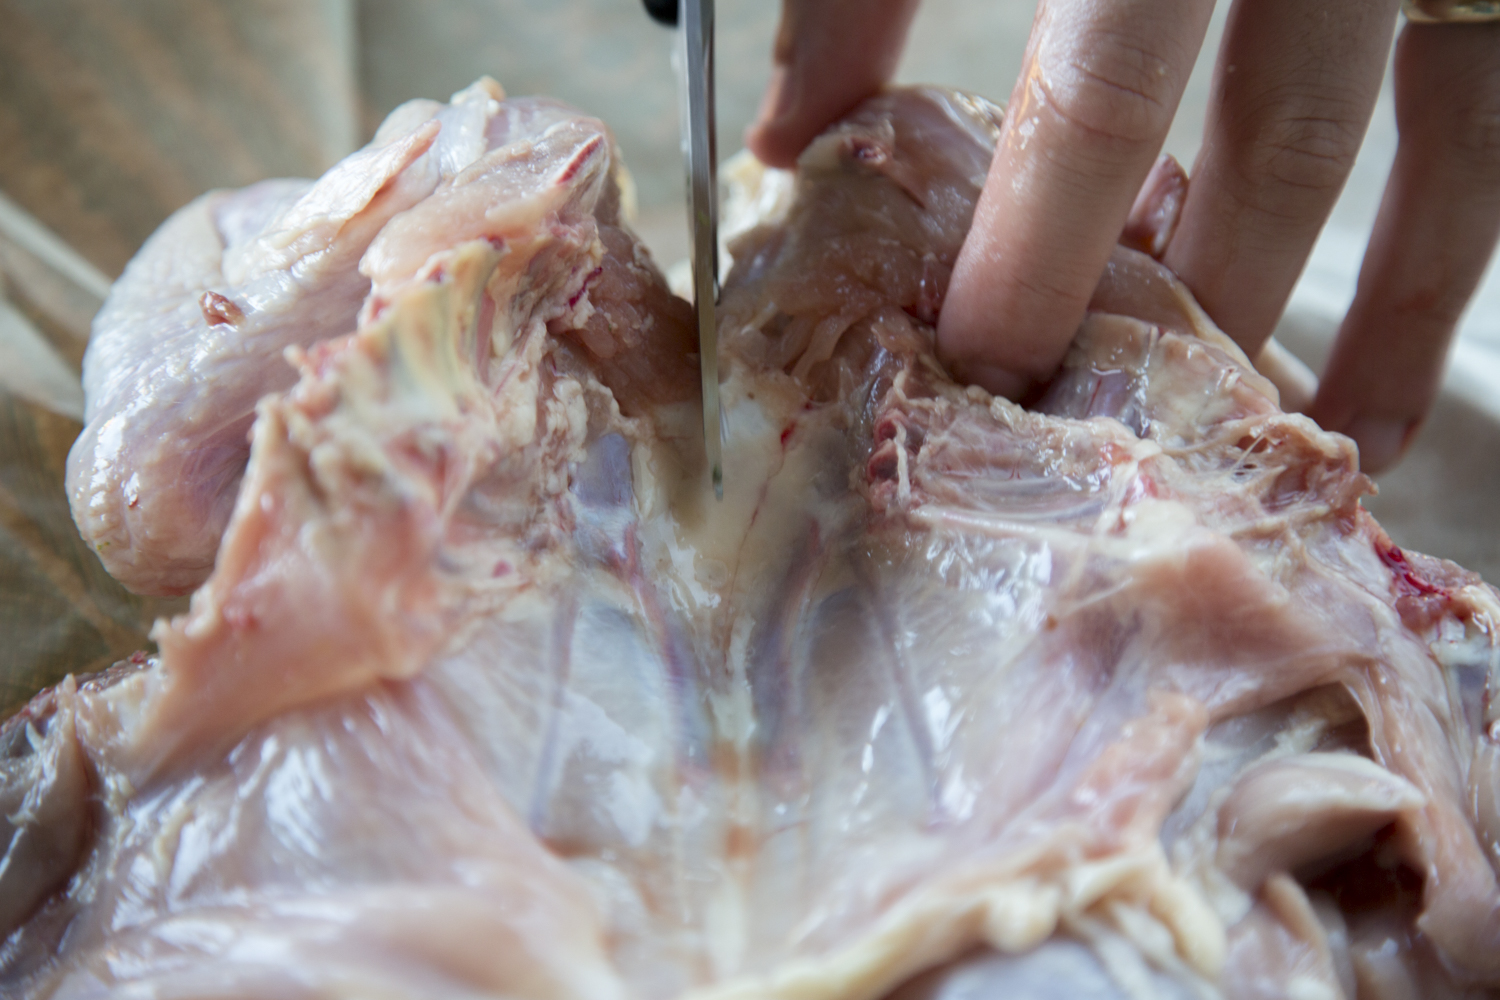 " alt="" />
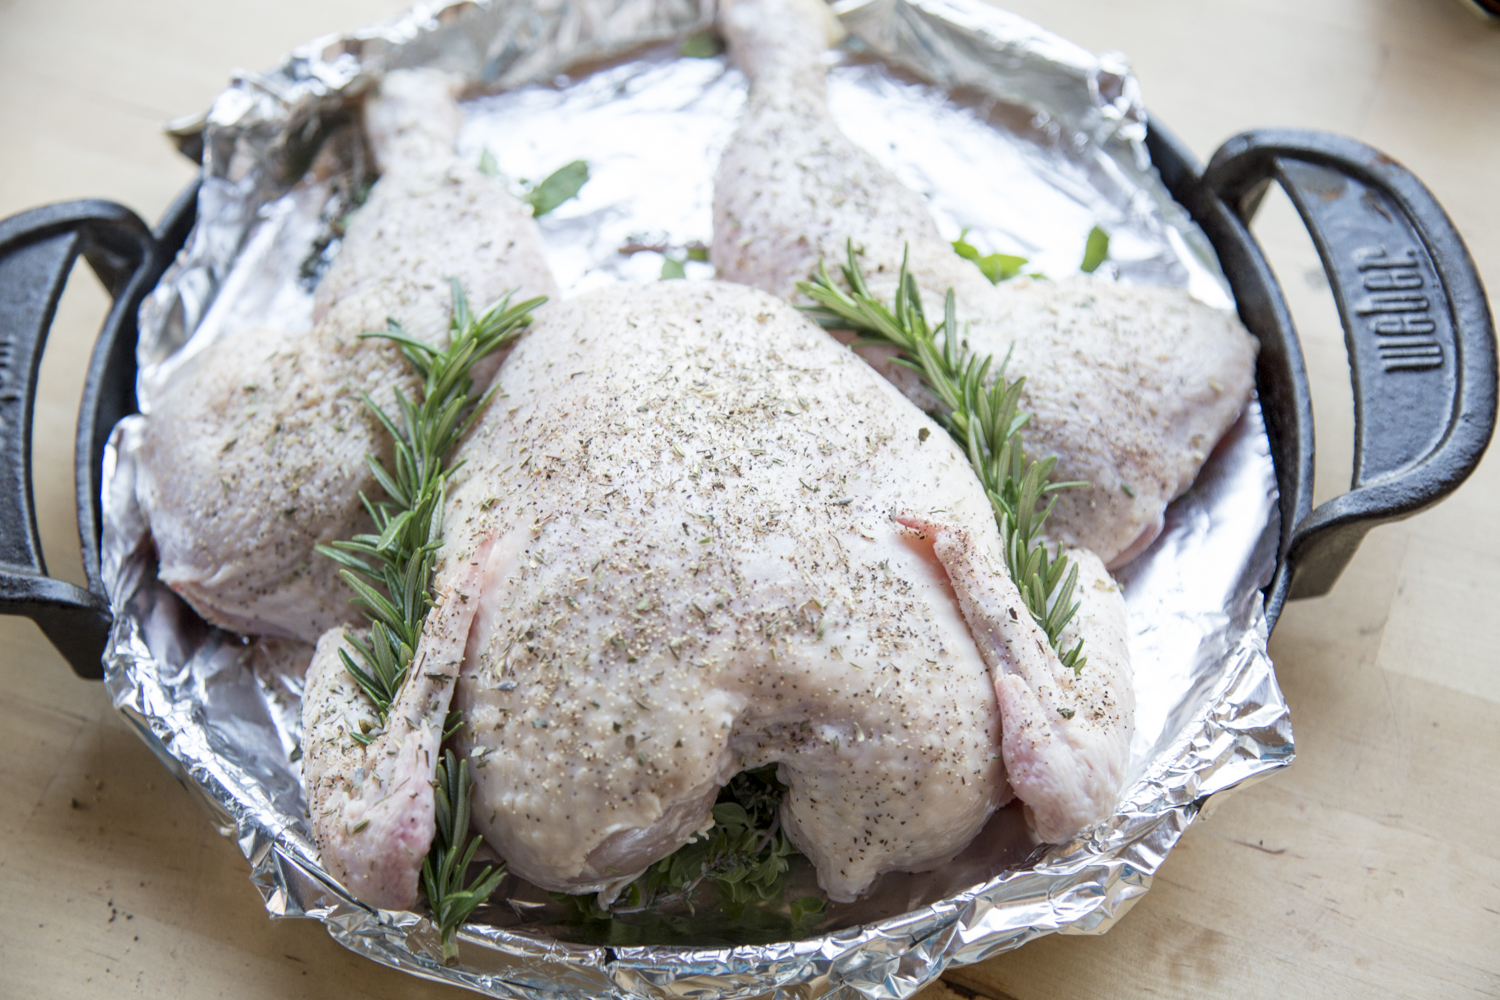 " alt="" />" alt="" />
- Serves: 4 Servings
- Prep Time: 15 mins
- Cooking: 30 mins
- Total Time: 45 min
For a long time we lived in New York City... as a matter of fact, the last time I even wrote a post on here was when we were in NYC! How time flies, but anyways..
When in NYC, it was very hard to make grilled meats since we did not have a BBQ. Well, now we do and we grill everything. But once in a while, I want something more elegant than that fire roasted deliciousness, so I would do something roasted or baked. Yet, chicken for example, takes much longer to roast whole than 2 breasts or thighs take to grill, so I hardly ever went that route. Enter Spatchcocking.
Yeah, we get it, the name is strange. But the principal is fantastic. We essentially are removing the back bone of the bird so that it cooks lying flat rather than as a hollow cavity. This speeds up our cooking time dramatically and also makes more areas of the skin exposed to high heat thus: more crispy skin. There's nothing better than having a roasted chicken where when you cut through it you hear that nice "crunch" of the skin. Try this one out, it will save you cooking time and impress anyone you serve it to!
Ingredients
Directions
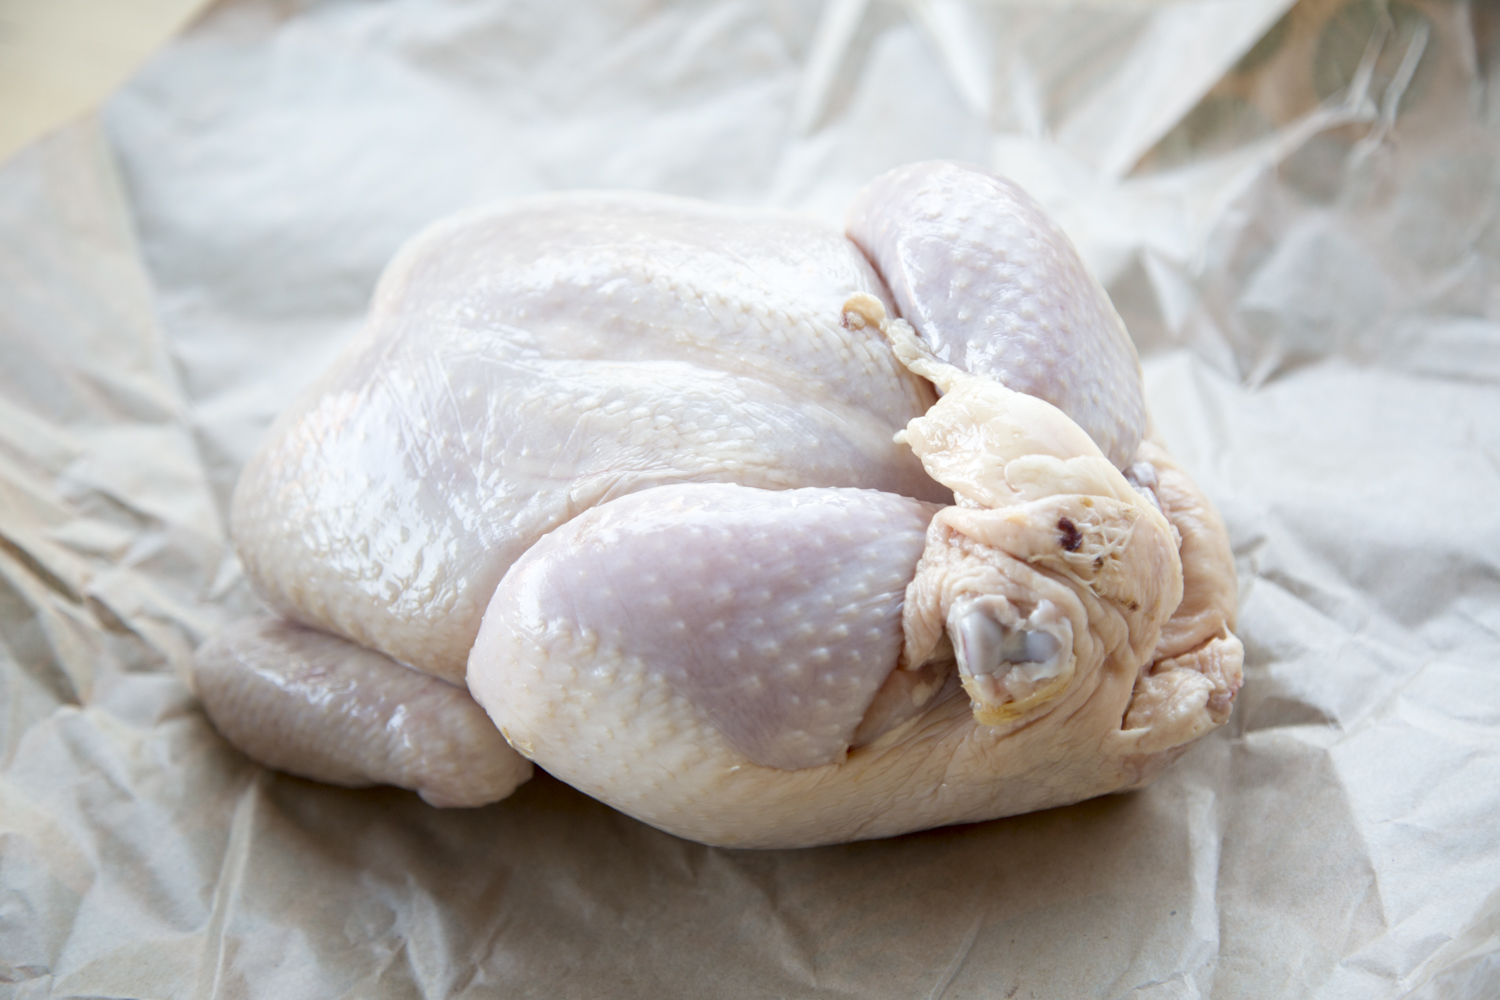
Preheat your oven to 425F. Start by taking your 3-4lb bird and removing any of the giblets and other messy parts they usually pack into the cavity. Once your cavity is hollow, rinse the chicken thoroughly in cold water and pat dry all over. This makes the bird easier to manage and gets the skin ready to be nice and crispy.
Now, this is the trickiest part that might seem daunting but trust me - let's take it slow and one step at a time :) Start by flipping the bird so the breasts are facing down, and you are able to clearly see the back bone (shown below).
Now, slowly begin to cut through from one end of the other using sharp kitchen shears. If you dont have kitchen shears, you can do this with a sharp knife as well but its just a bit trickier. As you cut from front to back, you be cutting through bone. Yes, it sounds weird. Yes, its not easy. But you're doing it right! Got it? Okay, half way home looks like this...
At this point, you can clearly see the separation of the back bone from the bird. The left side has been separated clean and the back bone is still attached on the right. Now, cutting through is much easier as you can actually see where you are cutting. So, you guessed it... snip snip!
Once you have finished cutting all the way through and have removed the back bone entirely, we need to make a small incision in the breast bone so that the chicken will lay flat. Really, just about a 1-inch snip will get the job done. Then, flip the chicken over so the breasts are face up then press firmly down to flatten the bird and you should have yourself a gorgeous spatchcocked chicken ready to roast!
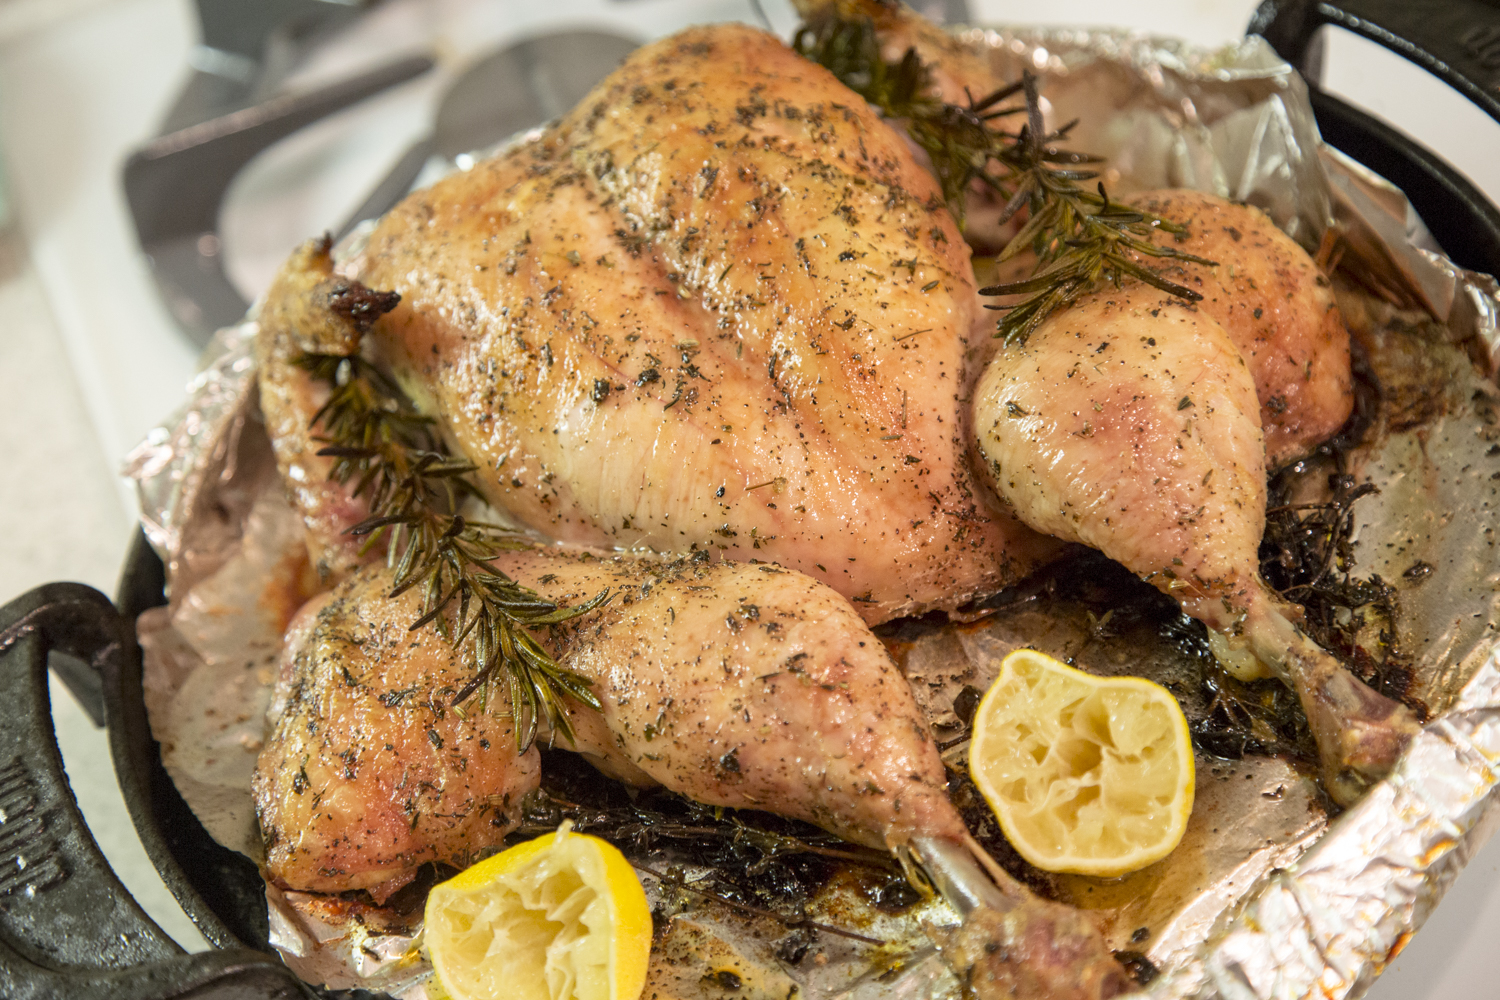
As shown above, gently tuck your rosemary underneath the breast and the legs, and for design points place two longer rosemary sprigs nestled under the wings and tucked into the small crease between the breasts and the thighs. This really is just meant to perfume the oven while the bird cooks (but also, it just looks great). Take your herbs and pepper and press firmly into the skin all over the chicken. If you can, let the bird sit in the fridge covered in tin foil for about 2-hours. This dries out the chicken skin allowing it crisp easier during the cooking process.
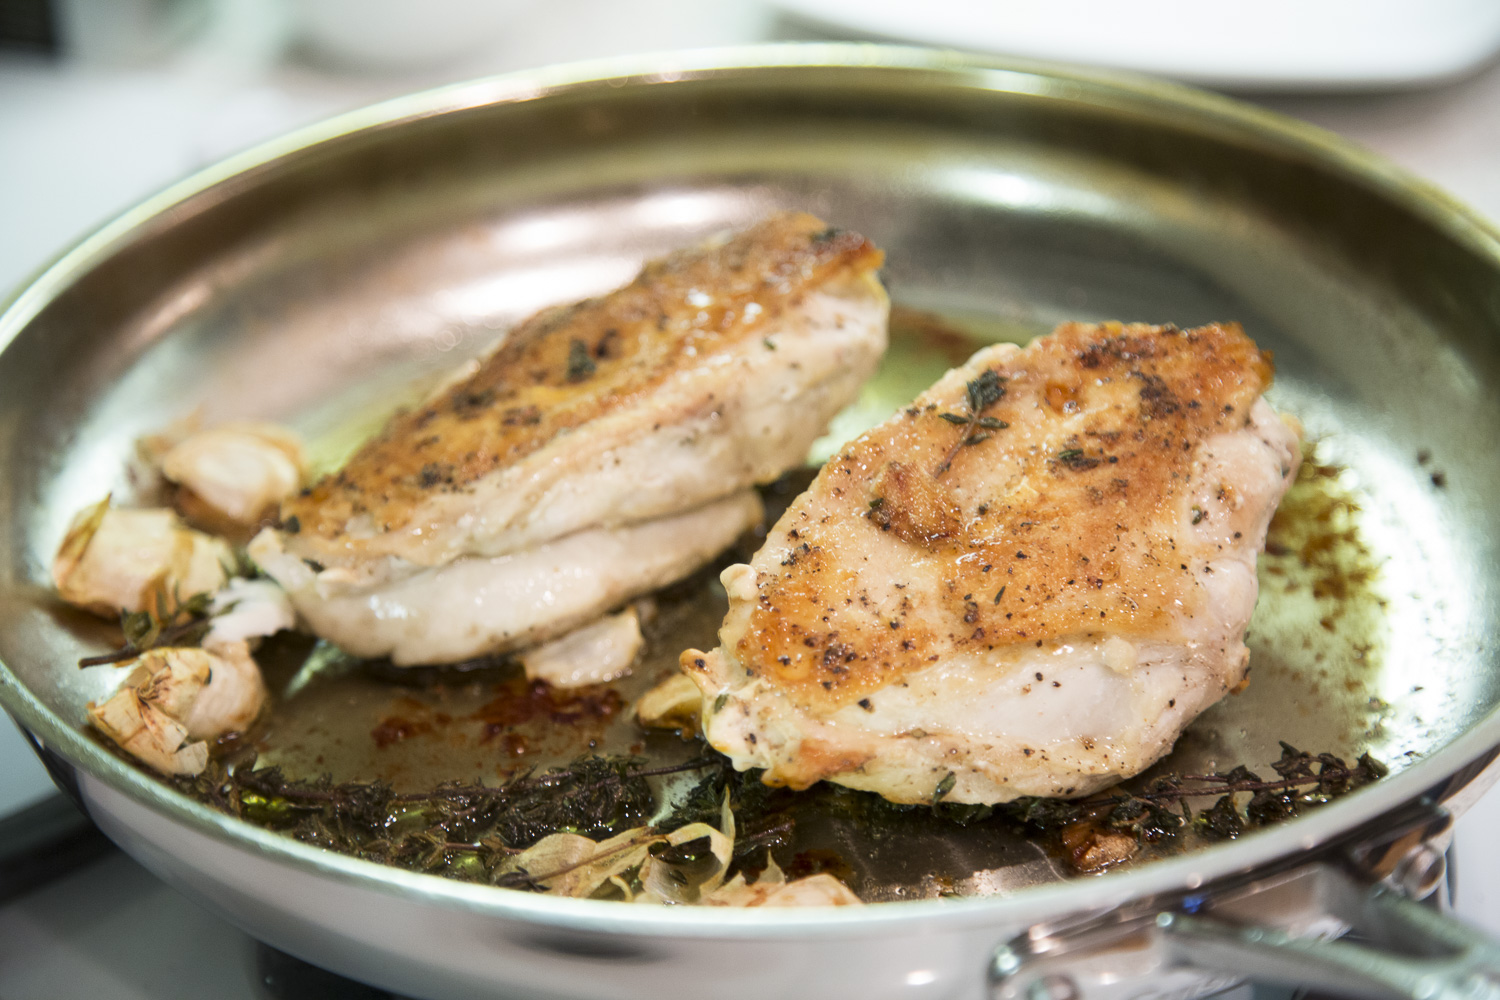
Either way, once you are ready to roast it, brush on all the olive oil onto the bird and make sure you get it all over it. This will help brown the skin and make it very crispy. Roast the bird in a roasting pan or cast iron skillet in the oven at 425F for about 30-35m for a 3-4lb bird, or until an instant read thermometer reads 165F inserted into the thickest part of the thigh but not touching the bone.
Once done, let the chicken rest for about 10 minutes before carving. While still hot, squeeze the lemon all over the chicken and get ready to enjoy a delicious meal!